Elderberry Syrup Recipe
Have you heard the buzz over the magic of elderberries yet? Nature provides us with so many wonderful herbs to support our health, and Black Elderberries (Sambucus nigra) are especially helpful during cold + flu symptoms. They have been shown to both reduce the risk of contracting cold/flu illnesses as well as shorten the duration of illness if you do contract one.
In fact, world-renowned Israeli virologist Dr. Madeleine Mumcuoglu discovered that: “elderberry disarms the enzyme viruses use to penetrate healthy cells in the lining of the nose and throat. Taken before infection, it prevents infection. Taken after infection, it prevents spread of the virus through the respiratory tract. In a clinical trial, 20% of study subjects reported significant improvement within 24 hours, 70% by 48 hours, and 90% claimed complete cure in three days. In contrast, subjects receiving the placebo required 6 days to recover.”
I like to be proactive about my family’s health and wellness by supporting our bodies in a way that makes it unlikely that illness will be able to take hold. Elderberry syrup is one of the ways I support my family’s wellness through cold + flu season. However, buying it pre-made can be VERY costly. One tiny bottle can be $20-30!! When you consider you can buy a whole pound of elderberries for this amount of money, which will make enough syrup to last our family of five through TWO cold/flu seasons, then it’s really no competition. And making elderberry syrup is so easy and quick! You can have this herbal remedy brewed in under an hour…
This post contains affiliate links. I only link to products that I have personally used and feel comfortable recommending. If you use these links, it does not increase the cost for you. It does help support this blog and my family, which allows me to bring you more helpful content. I really appreciate it when you use these links to purchase these products!
Have you heard the buzz over the magic of elderberries yet? Nature provides us with so many wonderful herbs to support our health, and Black Elderberries (Sambucus nigra) are especially helpful during cold + flu symptoms. They have been shown to both reduce the risk of contracting cold/flu illnesses as well as shorten the duration of illness if you do contract one.
In fact, world-renowned Israeli virologist Dr. Madeleine Mumcuoglu discovered that: “elderberry disarms the enzyme viruses use to penetrate healthy cells in the lining of the nose and throat. Taken before infection, it prevents infection. Taken after infection, it prevents spread of the virus through the respiratory tract. In a clinical trial, 20% of study subjects reported significant improvement within 24 hours, 70% by 48 hours, and 90% claimed complete cure in three days. In contrast, subjects receiving the placebo required 6 days to recover.”
I like to be proactive about my family’s health and wellness by supporting our bodies in a way that makes it unlikely that illness will be able to take hold. Elderberry syrup is one of the ways I support my family’s wellness through cold + flu season. However, buying it pre-made can be VERY costly. One tiny bottle can be $20-30!! When you consider you can buy a whole pound of elderberries for this amount of money, which will make enough syrup to last our family of five through TWO cold/flu seasons, then it’s really no competition. And making elderberry syrup is so easy and quick! You can have this herbal remedy brewed in under an hour.
If you have tuned into my herbalism shares over on Instagram, you’ll know that I am rather traditional when it comes to creating herbal remedies. I believe in giving yourself some leeway when it comes to your herbal medicines. Follow your intuition and use what you have in your pantry! Don’t have fresh ginger? Use ground! Don’t have honey? Use maple syrup or date syrup or molasses or even alcohol (for adults only)! Sometimes I use far more ginger/cinnamon/cloves than this recipe calls for. Actually— most of the time I do. I also add Rosehips for added Vitamin C. Some herbalists add nettles, mullein, and echinacea (but I prefer not to— I create separate tinctures for those). Have fun with it! Trust your inner guidance.
Ready for the recipe? Here ya go:
(FYI: This is a bulk recipe that makes about 2.5 quarts. I keep two quarts in the fridge for our fam and gift the other half quart to my parents, usually. You can double this and freeze part of it as well but I found that for our fam of five this is the perfect amount to have on hand in the fridge for the season. Sometimes come January I make another batch.)
(Psssst— Scroll down and click the button below to download a printable pdf recipe card. It contains this bulk recipe PLUS a recipe for a smaller batch if you’re looking to only make about a pint or so.)
Elderberry Syrup Recipe
Ingredients:
1/2 cup dried elderberries
3 cups filtered water
1 tsp ground cinnamon (or a stick of it)
1 tablespoon ground ginger (or fresh peeled/sliced ginger- as much as you’d like within reason)
1/2 tsp ground cloves (or whole cloves— I’ve added a few tablespoons of whole ones when I quadruple the recipe)
3/4 cup raw honey* (preferably local)
Optional: 1 cup of rosehips for added Vitamin C (these are a little sour but taste great once sweetened. I also love adding these to hibiscus sweet tea for a lovely sweet and sour tea.)
Instructions:
Place dried elderberries and spices (including optional herbs) in a pot with the filtered water and bring to boil.
Reduce heat (medium low heat) and simmer for 30 minutes (it’s okay if it goes a bit longer).
Mash the elderberries, herbs, and spices to release all the juicy goodness.
Strain the mixture into a bowl using a strainer lined with cheesecloth. Really squeeze every drop of juice out of the berries.
Allow the juice to cool to room temp.
Gently stir in the raw honey (it is best to use raw honey due to the medicinal and preservative benefits it brings to this recipe, but for adults alcohol could be used here as well since it would be a preservative. Maple syrup and date syrup have been used too.) Blend thoroughly.
Pour into jars and label them. These jars will keep many months in a cool, dry pantry or fridge. I store mine in the fridge throughout the entire season and it seems to stay perfectly good.
*omit honey for babies under 1 year or use date syrup or maple syrup— I found my babe would drink the syrup without any sweetener until he turned one.
Dosage:
Children take 1 tsp daily for prevention, increase to 3x daily to treat symptoms.
Adults take 1 TBSP daily for prevention, increase to 3x daily to treat symptoms.
We don’t take this daily, but we take it about 2-3x per week for prevention throughout cold/flu season, and we take it 3-4x daily starting at the onset of cold-like symptoms.
Safety:
Elderberry syrup is generally regarded as very safe for the young and old and even while pregnant/breastfeeding. I have taken it while pregnant and breastfeeding, my children take it, and my parents take it.
Theoretically elderberry medicines could interfere with immunosuppressant therapies so if you have more a complex health situation you should consult your care provider.
There were rumors going around that Elderberries can cause “cytokine storms,” which is a severe systemic inflammatory response syndrome that arises from some infections, and is commonly linked to monoclonal antibody drugs (MABs). Cytokine release syndrome cases that are not related to MABs are VERY rare, and the ones that do happen tend to be quite mild and easily treatable.
Elderberries DO increase cytokines. They trigger a wide range of immunostimulatory effects that increase the release of both inflammatory and anti-inflammatory protein messengers known as cytokines. As with all herbs, the actions are adaptogenic based on what the body needs.
Inflammation is not always bad. When you are facing an acute illness, you actually need inflammation. This is how elderberry works. It increases cytokines which spurs the immune system into action to aggressively fight pathogens. To the best of my research, elderberry has NEVER been associated with a true cytokine storm.
In the words of one of my favorite herbalists, Richard Whelan:
“All medicinal herbs that have the power to do good have the potential to do harm. The old maxim 'the poison is in the dose' precisely describes how too much of anything can be bad for us. The ancient rule to 'firstly, do no harm is, to this day, held as the core directive by all practitioners of traditional herbal medicine. Not only are we careful to do our best to use the right herbs, but equally we take care to not give too much of them or use them overlong.
For some years now, against this proven and safe way of herbalism, there has been a rising tide of excessive caution and scare-mongering in many parts of the world. The same authorities that, not so long ago, decried herbal medicines as ineffectual, have now taken up a different adversarial position; that they are dangerous substances that should only be prescribed by Doctors, who of course have zero training in them.
Unfortunately, the same unnecessary fear and worry has crept into many natural health websites and popular publications on herbs. Herbs that we have safely used for thousands of years, that have no reports of adverse reactions in the medical literature despite widespread use by millions of people, are suddenly described as contraindicated because of something that should have been seen as completely unimportant, or at the utmost a merely theoretical concern, such as a laboratory study on one of the herb's constituents to use an all too common example.
I want to remind you that the reason that herbs can never be patented and owned by any individual or corporation is because they are, and always will be, the People's medicine. They belong to all of us and it is my great hope in sharing this work that you will learn how to use them wisely for yourself, and the people you care for. Be safe, but do not be afraid.”
The more I delve into the world of herbs, the more I realize that many of the warnings against their use have been manipulations to keep people relying on the pharmaceutical industry. You know your body and your health better than anyone. Trust yourself first. Take charge of your own health.
I take charge of my family’s health in many different ways.
Read more about our wellness arsenal here.
Remember, nothing on my blog should ever be construed as medical advice. Read my full disclaimer for more information.
Fire Cider Recipe
I’ve been feeling the call to be more self sufficient— to take my family’s health and future into my own hands and not rely too heavily on outside sources. Have you?
A few weeks ago, I started a popular herbal Oxymel— Fire Cider! The Greek word Oxymeli means “acid and honey”— which is exactly what an oxymel consists of. They are herbal medicines made with apple cider vinegar infused with herbs, then mixed with honey. Fire cider is a long held old fashioned remedy that is used to boost the immune system and to help aid the upper respiratory system. I decided to prepare a large batch for this years cold/flu season, because I am a big believer in terrain theory (over the commonly held germ theory.) I believe that if we support our bodies and immune systems, that we are able to avoid illness even if we come into contact with the germs…
This post contains affiliate links. I only link to products that I have personally used and feel comfortable recommending. If you use these links, it does not increase the cost for you. It does help support this blog and my family, which allows me to bring you more helpful content. I really appreciate it when you use these links to purchase these products!
I’ve been feeling the call to be more self sufficient— to take my family’s health and future into my own hands and not rely too heavily on outside sources. Have you?
A few weeks ago, I started a popular herbal Oxymel— Fire Cider! The Greek word Oxymeli means “acid and honey”— which is exactly what an oxymel consists of. They are herbal medicines made with apple cider vinegar infused with herbs, then mixed with honey. Fire cider is a long held old fashioned remedy that is used to boost the immune system and to help aid the upper respiratory system. I decided to prepare a large batch for this years cold/flu season, because I am a big believer in terrain theory (over the commonly held germ theory.) I believe that if we support our bodies and immune systems, that we are able to avoid illness even if we come into contact with the germs.
Here’s the recipe:
1 medium onion, chopped
10 cloves of garlic, crushed or chopped
2 jalapeno peppers, chopped
Zest and juice from 1 lemon
1/2 cup fresh grated ginger root
1/2 cup fresh grated horseradish root
1 Tbsp. Turmeric powder
1/4 tsp. Cayenne powder
2 Tbsp. Dried Rosemary leaves
1/4 cup of raw, local honey (adjust to taste)
Chop up all your ingredients. Fill your jars evenly, then cover with ACV. I use these plastic lids with silicone sealing rings for covering my mason jars when I am making tinctures and oxymels or storing herbs. Let sit in a cool, dry place for 4-6 weeks. Then strain through a cheesecloth (I like these or these because they are reusable) and add honey. Mix til incorporated, taste, and add more honey if desired. This doesn’t have to be refrigerated but it can be.
I do not follow perfect proportions with all of my herbal medicines. With folk remedies like this, I take a rather intuitive approach, and I use what I have. I did not have horseradish. I had more jalapeños and ginger and slightly less onion. I just chopped it all up and divvied it out between the 4 jars I had.
Do you make and take fire cider? Have you heard of it before? What are you doing to take charge of you and your family’s health?
A few serving suggestions:
🔆 Straight up: Rosemary Gladstar recommends taking 1 to 2 tablespoons of the oxymel at the first sign of a cold, and then repeating every 3 to 4 hours until symptoms subside. Some people also take fire cider as a preventative during cold and flu season.
🔆 Mix with lemonade or orange juice
🔆 Mix with hot water and extra honey to make a tea
🔆 Use in place of vinegar in salad dressings and condiments * (Recipe)
🔆 Drizzle on steamed vegetables or sautéed greens
🔆 Use in marinades for meat, tofu, and tempeh *
🔆 Add to soups and chilis *
🔆 Try a couple of dashes in a cocktail, such as a Bloody Mary (I like to make virgin bloody marys to drink with lox and bagels in the morning— as a special treat occasionally) *
*= before adding honey
I hope you enjoy this recipe, and that it brings you and your family an extra health boost this winter! I also support my family’s wellness with elderberry syrup, immune-boosting superfoods, plenty of fresh air & sunshine when we can get it, cod liver oil with vitamin D, and real, whole foods.
Click here to read more about our family’s full wellness arsenal.
Bambino Huey Copycat Recipe ("Bambino Huxley")
Years ago, in the early days of my relationship with my now-husband, he told me about an exquisite, elusive dessert called the “Bambino Huey.” He had experienced it in an italian restaurant called “Boccone’s,” and he absolutely raved about its flavor and uniqueness. Boccone’s closed when he was a teenager and he hadn’t seen the dessert for nearly 20 years by the time he was telling me about it. His eyes lit up and I could almost hear his stomach growl as he described the special treat.
A few years and two kids later, my husband’s mom surprised him with some “Bambino Huey” for his birthday. Turns out, Al (the creator) was selling it out of The Bread Box bakery in Artisans’ Alley, San Antonio. She bought it “to go” in individual plastic ramekins, and we re-heated it and added real whipped cream at home. This was my first time to try the “Bambino Huey” and OH MY GOODNESS Y’ALL… it totally lived up to the hype! It was creamy and gooey and buttery and decadent and delicious! I had never tasted anything like it, so it was difficult to describe it. It was such a mystery, my mind started trying to piece together the flavors I was tasting. We were so excited to be able to get our hands on this delectable dish, but it wasn’t for long. The very next time we visited San Antonio, we went to The Bread Box only to find that he had stopped selling them there!
Another year or two passed before we heard news that Al would be selling his famous dessert at Conroy’s Bar & Grill. We were elated! We purchased them a few times through Conroy’s and delighted over the ability to get our “Bambino Huey Fix” once again. However, they were quite expensive, and my mind kept mulling over the flavors. I knew that this recipe was not that complex. I could see there was a cake-like layer with an additional goey, buttery, cream-cheesy layer. I just had to get the right ratios. So, inspired, I started testing recipes. It took me a few tries, but I now have a finalized recipe that our family swears is even BETTER than the original (dare I say it?).
So, without further ado, here is my Copycat Bambino Huey Recipe (I call it Bambino Huxley, named for my youngest son)…
This post contains affiliate links. I only link to products that I have personally used and feel comfortable recommending. If you use these links, it does not increase the cost for you. It does help support this blog and my family, which allows me to bring you more helpful content. I really appreciate it when you use these links to purchase these products!
Years ago, in the early days of my relationship with my now-husband, he told me about an exquisite, elusive dessert called the “Bambino Huey.” He had experienced it in an italian restaurant called “Boccone’s,” and he absolutely raved about its flavor and uniqueness. Boccone’s closed when he was a teenager and he hadn’t seen the dessert for nearly 20 years by the time he was telling me about it. His eyes lit up and I could almost hear his stomach growl as he described the special treat.
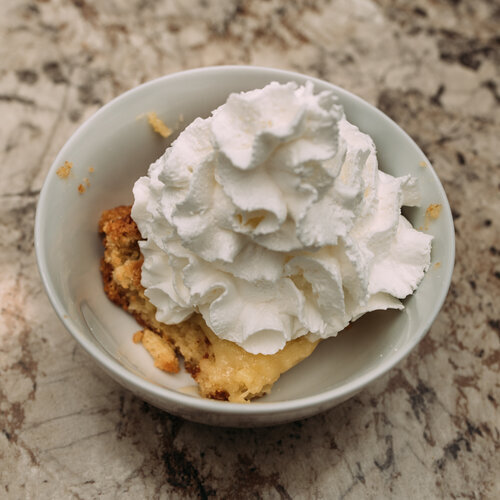
A few years and two kids later, my husband’s mom surprised him with some “Bambino Huey” for his birthday. Turns out, Al (the creator) was selling it out of The Bread Box bakery in Artisans’ Alley, San Antonio. She bought it “to go” in individual plastic ramekins, and we re-heated it and added real whipped cream at home. This was my first time to try the “Bambino Huey” and OH MY GOODNESS Y’ALL… it totally lived up to the hype! It was creamy and gooey and buttery and decadent and delicious! I had never tasted anything like it, so it was difficult to describe it. It was such a mystery, my mind started trying to piece together the flavors I was tasting. We were so excited to be able to get our hands on this delectable dish, but it wasn’t for long. The very next time we visited San Antonio, we went to The Bread Box only to find that he had stopped selling them there!
Another year or two passed before we heard news that Al would be selling his famous dessert at Conroy’s Bar & Grill. We were elated! We purchased them a few times through Conroy’s and delighted over the ability to get our “Bambino Huey Fix” once again. However, they were quite expensive, and my mind kept mulling over the flavors. I knew that this recipe was not that complex. I could see there was a cake-like layer with an additional goey, buttery, cream-cheesy layer. I just had to get the right ratios. So, inspired, I started testing recipes. It took me a few tries, but I now have a finalized recipe that our family swears is even BETTER than the original (dare I say it?).
So, without further ado, here is my Copycat Bambino Huey Recipe (I call it Bambino Huxley, named for my youngest son):
Copycat Bambino Huey Recipe
“Bambino Huxley”
Ingredients
Cake:
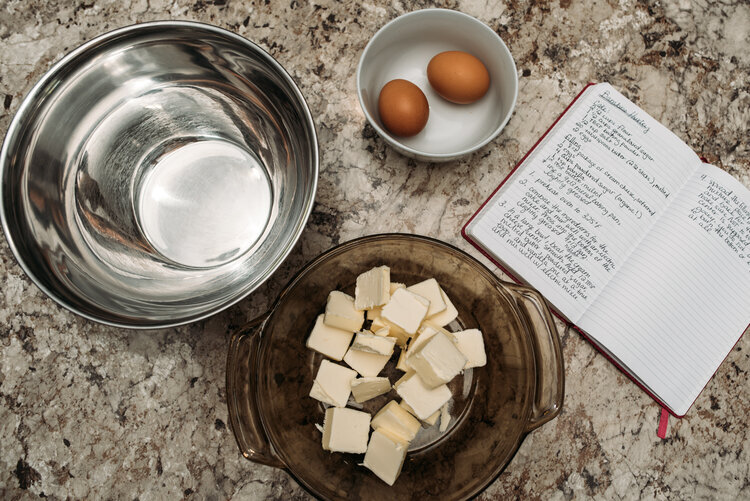
2.5 cups organic unbleached all-purpose flour
1.5 cups granulated sugar
1 TBSP Baking powder
1/2 tsp salt
20 TBSP (or 2.5 sticks) Butter, melted
2 eggs
Deliciously Gooey Topping:
1 (8oz) Package Cream Cheese, softened
12 TBSP (or 1.5 sticks) Butter, melted
1 tsp Vanilla
4 cups organic powdered sugar
2 eggs
Instructions:
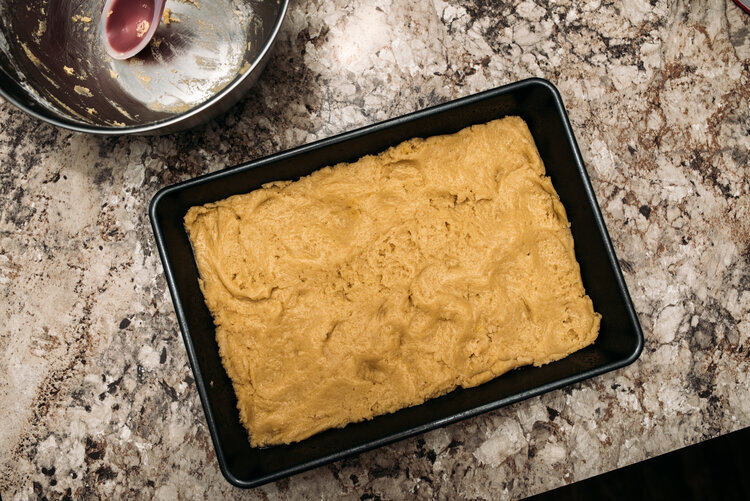
Preheat oven to 325°F. I have the best results when using 9x13 metal baking pan, like this one. You can use a glass dish, but the texture of the crust does change slightly. You can also choose to make this in the original “Bambino Huey” style (individual portions) by baking it into ramekins like these, but I haven’t tried it this way since I’m always baking for a big group (hello family of five). Lightly grease your pan.
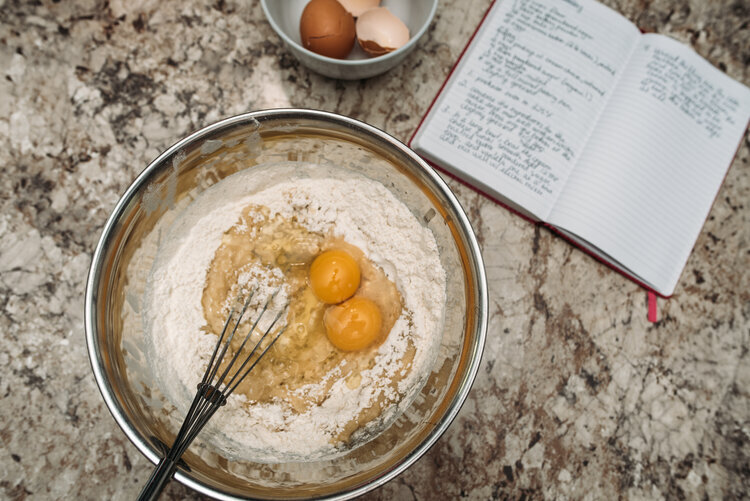
Combine the ingredients for the cake and mix well with an electric mixer, or with a fork. Press into the bottom of the lightly greased pan.
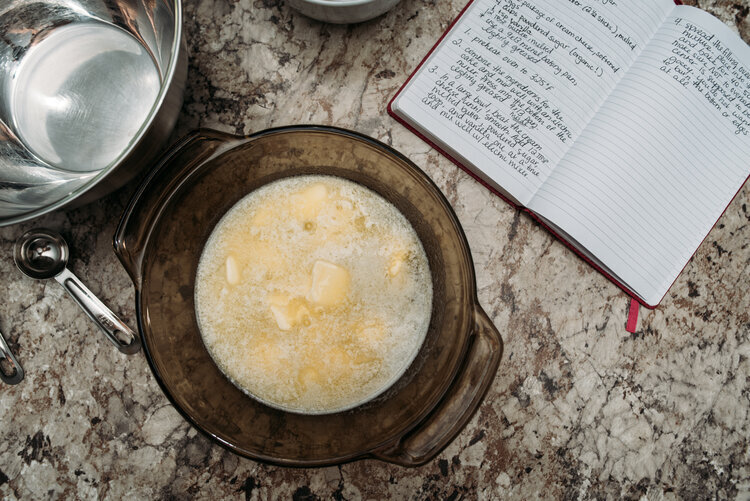
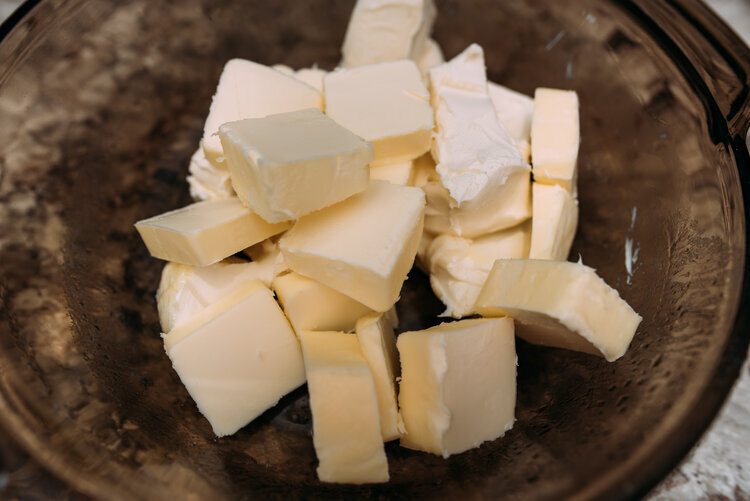
To soften the cream cheese and butter, I usually slice them both into a microwave safe bowl and microwave them until the butter melts, then I leave them sitting together for a few minutes.
In a large bowl, beat the cream cheese and butter until smooth. Add the vanilla, then half of the powdered sugar. Mix, then add the eggs and mix again. Now add the remainder of the powdered sugar and blend until smooth.
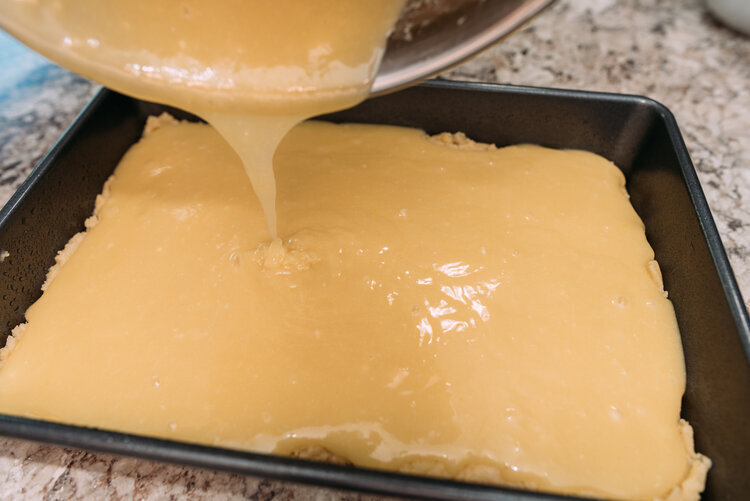
Spread the filling over the cake mixture.
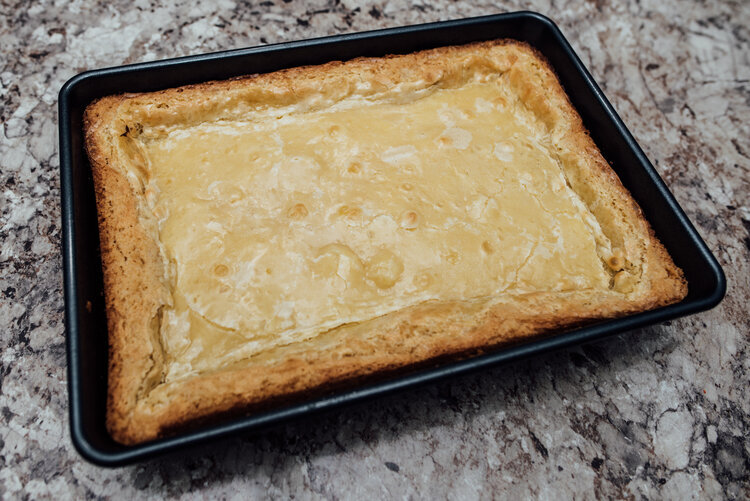
Place into the oven and bake for 40-45 minutes. Make sure not to overbake. The top/center is supposed to be gooey, so you mostly need to check that the cake edges are golden. You don’t want to burn the cake bottom.
Let cool 30 minutes.
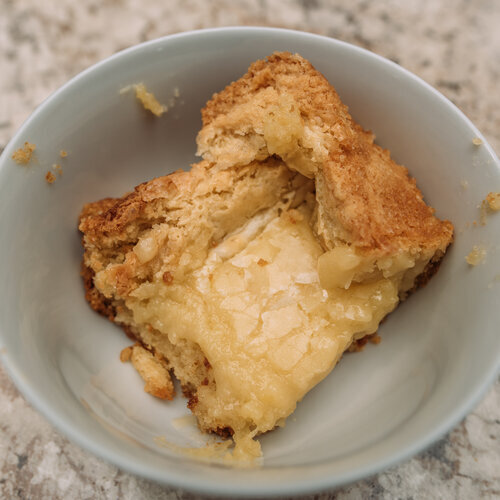
Serve warm with real whipped cream! This cake is super rich, so small servings are best. If the cake has cooled too much, just pop each serving in the microwave for about 10-15 seconds before adding your whipped cream.
The leftovers can be stored in the fridge (up to 3-5 days). Heat each serving in the microwave for 20-30 seconds before adding whipped cream and digging in. This dessert does freeze well. You can freeze the whole cake or you can create individual portions and freeze. Just thaw in your fridge and heat before serving.
Homeschooling Crafts: Air Dry Clay Art With Tiles and Pressed Flowers
Many of you over on my instagram page saw us creating these in my stories and asked about the materials we used, so I thought I’d share here on the blog.
As a homeschooling mama, I’m always on the lookout for fun, hands-on projects to do with the kids. I’ve never used air dry clay before, but I thought ‘what the hey, I’ll try this stuff out.’
IT. WAS. SO. FUN. Y’ALL!
It is remarkably workable, and very similar to other clay I’ve worked with back when I played around with ceramics often (still a dream of mine to get back into that…). We had so much fun that I’m considering buying this BIG box of clay soon so that the kids and I can create clay models to our hearts’ content.
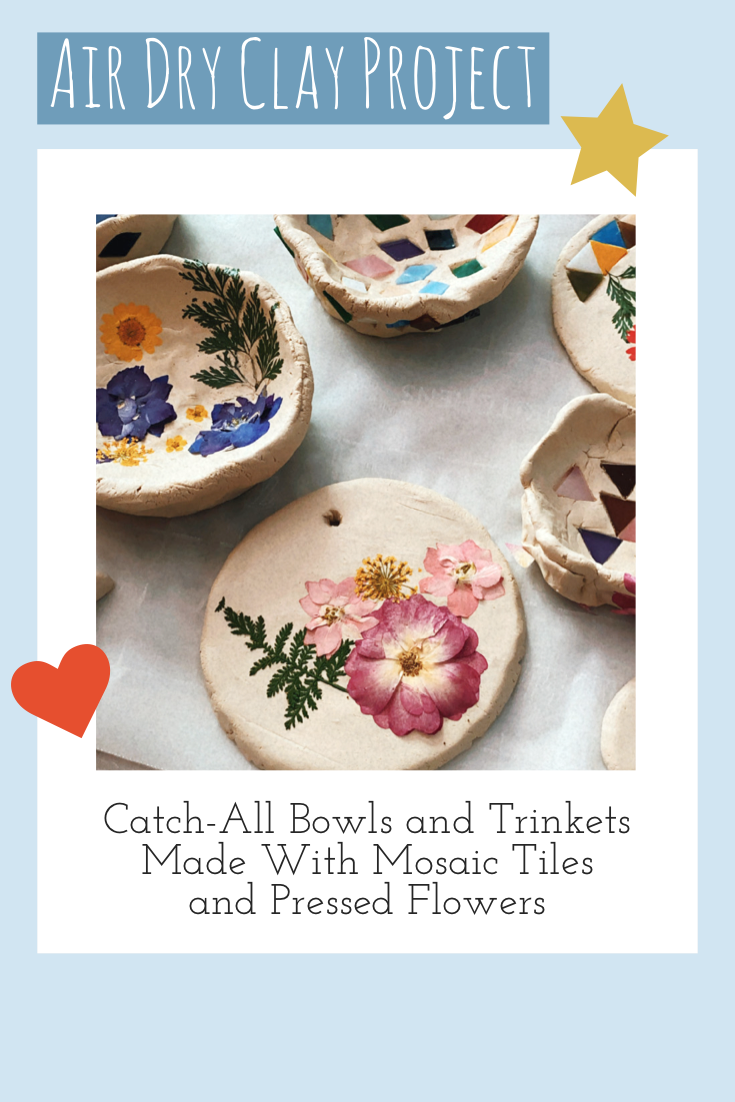
Anywho… so I started out with the idea of making some small catch-all bowls with this air-dry clay. Then my inspiration ran away with me and I decided I wanted some options for extra decor. I decided to grab some tiny mosaic tiles and pressed flowers as well. Since I wanted to be sure the add-ons were protected and I wanted a way to seal the end results, I also got some paintbrushes and Mod Podge.
Once we had all the supplies, we were ready to go! We just had to wait until Huxley was down for a nap so that he didn’t try to swallow the mosaic tiles or stick his foot into our masterpieces…
This post contains affiliate links. I only link to products that I have personally used and feel comfortable recommending. If you use these links, it does not increase the cost for you. It does help support this blog and my family, which allows me to bring you more helpful content. I really appreciate it when you use these links to purchase these products!
Many of you over on my instagram page saw us creating these in my stories and asked about the materials we used, so I thought I’d share here on the blog.
As a homeschooling mama, I’m always on the lookout for fun, hands-on projects to do with the kids. I’ve never used air dry clay before, but I thought ‘what the hey, I’ll try this stuff out.’
IT. WAS. SO. FUN. Y’ALL!
It is remarkably workable, and very similar to other clay I’ve worked with back when I played around with ceramics often (still a dream of mine to get back into that…). We had so much fun that I’m considering buying this BIG box of clay soon so that the kids and I can create clay models to our hearts’ content.
Anywho… so I started out with the idea of making some small catch-all bowls with this air-dry clay. Then my inspiration ran away with me and I decided I wanted some options for extra decor. I decided to grab some tiny mosaic tiles and pressed flowers as well. Since I wanted to be sure the add-ons were protected and I wanted a way to seal the end results, I also got some paintbrushes and Mod Podge.
Once we had all the supplies, we were ready to go! We just had to wait until Huxley was down for a nap so that he didn’t try to swallow the mosaic tiles or stick his foot into our masterpieces.
I started out by directing the kids to make little pinch pot catch all bowls. We rolled the clay into a ball about twice the size of a golf ball but still smaller than a tennis ball. Then we pressed into the center of it and pinched it around the sides until it resembled a bowl shape. Be careful to leave the sides relatively thick so that your kids don’t press right through it when adding their decorations. We had to remake a couple of our pieces because the kids shoved mosaic tiles all the way through to the other side. Also periodically unstick the project from the table, especially before starting to press flowers and tiles into it.
After we finished the bowls, my kids were still excited to keep creating, and we still had over 30 minutes left until the end of Huxley’s nap, so we went ahead and created a few more little trinkets: small plaques with holes to hang them from, a small tray, and a little fish with mosaic tile scales.
The clay says it takes 2-3 days to air dry, but of course it depends on the thickness of the clay. We plan to give it 3-4 days at least and then finish them by painting them with a couple layers of Mod Podge.
Materials Used:
Crayola Air Dry Clay (Comes in 5lb or 25lb sets)
Pressed Flowers (You could totally make these yourself too if you planned ahead in the springtime!)
Mod Podge (They also make a dishwasher safe version and an outdoor use version, and more!)
Seriously though… I’m so stoked about how this turned out that I plan to order the huge 25 lb box of this clay and some better clay working tools as well. This clay is PERFECT and really feels like the clay I am accustomed to using when using a kiln. The possibilities are endless!
Group B Strep: Testing, Treatment, and Alternatives
Did you test positive for GBS during your pregnancy? Did you know that even if you test positive, you have options?
I tested positive for GBS when I was pregnant with Titus and I chose to go by the same protocol that they use in the UK (where they have lower infant mortality rates than we do here.) We chose to turn down routine antibiotics and to only use them if other risk factors or signs of infection were present. These risk factors include:
Having previously given birth to a baby who had GBS infection
GBS bacteria in urine (either with or without symptoms)
The amniotic sac (‘waters’) being broken for more than 18 hours prior to delivery
Onset of labor or waters breaking before 37 weeks
Developing a fever higher than 100.4 F during labor
We also seriously limited cervical exams, and did not do any cervical exams once my waters had broken. Cervixes are not crystal balls; they cannot predict when a baby can or will be born. Cervical exams are unnecessary and can introduce bacteria into the amniotic fluid.
I get frustrated by how much fear is instilled into women surrounding GBS testing and results.
Did you know that we are ALL colonized with GBS? It is transient, so it comes and goes. GBS bacterium in the gut + vagina is a variation of normal. There is a difference between GBS colonization and GBS infection. GBS colonization is normal and expected. Even your infant can be colonized with GBS without it being a problem. An infection indicates an imbalance; an overgrowth of the GBS bacteria, or having them in an area they shouldn’t be in (such as your baby’s lungs). It is infection that must be avoided.
A test at 36-37 weeks will not accurately reflect your bacterial environment when labor begins. A positive test means you were positive on the day of the test; it doesn’t mean it will be there at birth or that it will be detrimental to your baby.
Did you know that mothers can develop immunity to GBS and pass it on to their babies?
Medical professionals have a tendency of “lying with statistics.” The claim is that if you do test positive for GBS and you consent to IV antibiotics during labor, it reduces your baby’s risk of developing GBS related infection by 80%. This sounds convincing! What they don’t add is that your baby’s risk is dropping from 1% down to 0.2%.
Did you know that breastmilk and breastfeeding is protective against GBS? This is so important!
Research has shown that antibiotics during labor do not reduce mortality rates for GBS, and antibiotics come with inherent risks to both mama and baby’s microbiome.
So do the benefits of antibiotics REALLY outweigh the risks?
That’s for you to decide! Each person must weigh the risks vs benefits for themselves and their baby.
Here are some resources and readings for more info:


